Hosting Open Source Projects At Home
Table of Contents #
Why #
So, why would you ever need to host anything at home? We live in the age of cloud computing. You can sign up with any mainstream provider and have all the functionality of the services we are going to talk about, without all the configuration hassle.
There are three main reasons for me. First and foremost, it is fun. Configuring and setting up a home server that works fluidly without needing much maintanence is satisfying. If this sounds ridiculous to you, other reasons aren’t important. It comes down to personal preference. Cloud is OK.
This brings us to the second reason. Where cloud may not be OK.
Privacy. We all know that our data is already spilled out there. No matter how much you try, if you are benefiting from FAANG services, they own and sell your data. It may be an acceptable trade in exchange of the services they provide. I am OK with that. However, if you are not, self hosting is also for you.
Thirdly, there are some projects that help you administer your internal home network. For example you can set up an intermediary DNS and block ads on all of the devices connected to your WiFi without any browser extension or adblock installment. You can’t easily do this with any of the cloud services.
How #
First thing to get is an old pc which is lying around. Or better, a raspberry pi… or better, a rpi cluster!
Raspberry PI is the most efficient way to go in my opinion. It is:
- cheap
- tiny (you can stick it to your wall)
- low power usage (consumes 1W on average - I have model 3b)
- has everything you need to get started

Booting Up Raspberry PI #
- First, flash an OS.
- Easiest and most compatible is the Raspberry Pi OS.
- I recommend 64-bit version because some docker images are only compatible with it.
- Find the list here
- I have the desktop version but you don’t necessarily need it.
- Download and follow the instructions on the Raspberry Pi Imager.
- SSH and WiFi configuration step is important in the imager. We will connect with SSH.
- Connect to your server.
- If you flashed and set up wifi and ssh properties successfully, you can now connect to you pi from any other pc on your home network.
- Find your pi’s assigned IP. You can get this info from your router’s interface. (e.g: 192.168.1.1 or something like that)
- open up your terminal and connect through ssh:
ssh pi@<pi ip>. For example:ssh pi@192.168.1.105 - Recommended if you are using Windows on PC: Install WinSCP for transferring files to your pi. It will come in handy.
We need to CONTAIN them! #
If you are hosting more than one project with different infrastructures, docker saves the day. Best thing about these open source project developers are that they also release their docker images. You don’t even need to build the image nowadays. Just downloading from the hub and slapping some parameters makes it ready to go.
$ sudo apt-get update && sudo apt-get upgrade
$ curl -fsSL https://get.docker.com -o get-docker.sh
$ sudo sh get-docker.sh
Now we are ready to download and run some projects which are built for self-hosting!
Note: If you are using a pi with 64 bit os, choose linux-arm64 among the container image versions.
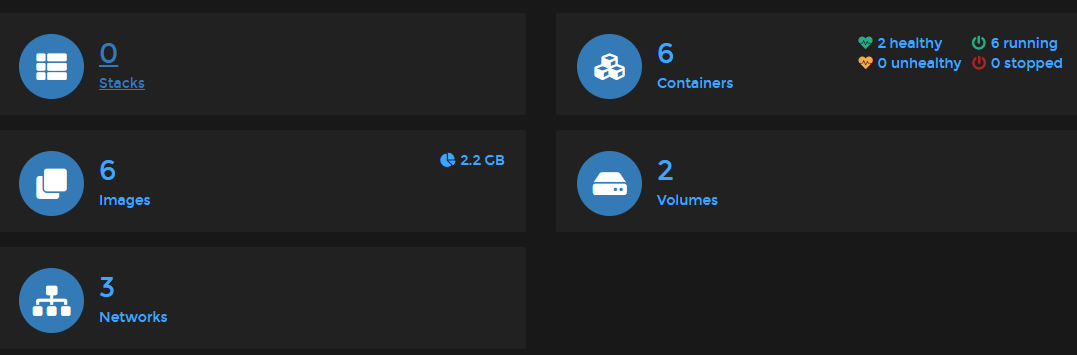
My current running project list is:
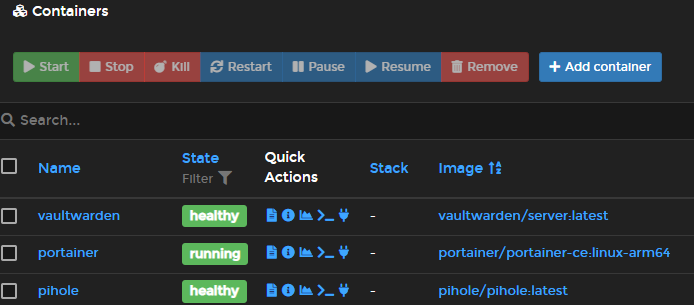
- Portainer: Manage your docker ecosystem with a web interface. This is a must imho.
- Watchtower: Automatically update your docker images to the latest version from the hub.
- Bitwarden: Best password manager out there.
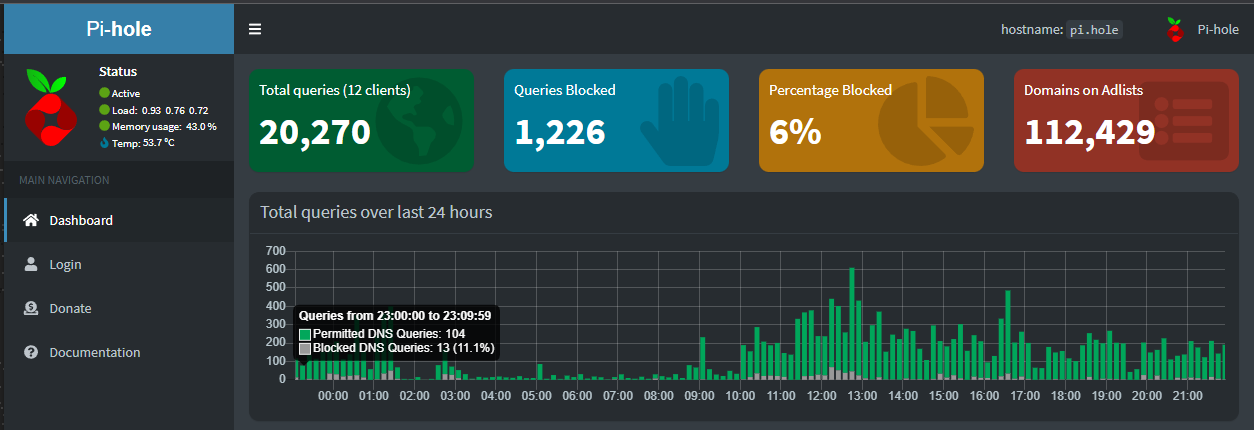
- Pihole: DNS Ad-Blocker for your home network.
- My Side Projects:
- Custom Discord bot.
- Simple ethereum low gas price e-mail notifier.
Let’s look into how we can set up most of them.
Projects to Host #
There are a myriad of open source projects to host on your home server. However, if you are using a pi, the resource intensive ones might be too much for it to handle. To give you an idea, I’ve tried to host Firefly III which is a self budgeting and expense tracker tool and it uses MySQL DB. It gobbled up my poor little pi’s resources to the point that other containers suffered and froze. On the other hand, projects that use more lightweight modules tend to be more easy to maintain. Like Vaultwarden with SQLite.
Docker Management Interface #
This one is for ease of use. Portainer works well. It provides an user interface where you can see details about running containers, images etc. You can start/stop/kill/remove them, organize and manage them. You can do these from the terminal but this is more convenient in my opinion.
$ docker run -d --name=portainer --restart unless-stopped -v /var/run/docker.sock:/var/run/docker.sock -v portainer_data:/data portainer/portainer-ce:linux-arm64
I will typically use --restart unless-stopped for most of my containers. I don’t want to manually start them if the server reboots or loses power for some reason.
Keeping Your System Up To Date #
If you are using cloud services, one thing you don’t need to worry about is that the application’s maintanence. The risk of vulnerability is provider’s responsibilty. If you decide to host your own, you need to keep an eye on the version of your apps. Consider a zero-day exploit has been discovered for a library which one of your apps use. The maintainers of the repo quickly and heroically releases a new version. This is nice, except how would you know about these events if you are not constantly skimming the news for your favorite projects. This is not maintanable. We need to find a way to automatically update our container images if there is a new version out there in the hub.
Watchtower comes to the rescue. I love this project. It periodically checks if there is a newer version the docker hub and downloads and spins up a new instance for you. Then if you want, it emails you what it had done. I omitted the email parameters here, you can check the docs.
$ docker run -d --name watchtower -v /var/run/docker.sock:/var/run/docker.sock containrrr/watchtower:arm64v8-latest
Note: If you have critical apps and want to opt-out from watchtower updates to avoid failures, you can put an extra parameter to your target docker run script like this: --label=com.centurylinklabs.watchtower.enable=false
Manage Your Passwords #
Until the global password problem is solved with some asymmetric cryptography, you are stuck with your 800 different (I hope!) passwords on every different platform. Best password manager I have used is Bitwarden. More specifically its lightweight open source version Vaultwarden. You can also use Bitwarden freely on the cloud. This is also great on Bitwarden’s part and I appreciate the business decision to do it this way. But for our purposes, we will stick with the self-host option.
I like that:
- It has nice and easy to use interface.
- Has browser extension and mobile app (that will connect to your home instance).
- It is open source.
- It is actively developed.
- Works perfect on docker on pi.
- It is easy to backup. (just back up the sqlite.db file)
First things first, you can’t set this one up from scratch with just one docker command. It MUST have an SSL certificate to work properly. So you have 2 options:
- Create a self-signed certificate.
- Use this if you don’t have a domain that will answer the DNS query to get a free certificate from Let’s Encrypt.
- Create the root CA and sign a certificate with it. You can use OpenSSL.
- You need to add this root CA to your trusted roots on your client.
- You see that it starts to get cumbersome if you plan to access from different devices.
- Good news is that you won’t need to renew the certificate so soon because you choose the dates!
- Get an SSL certificate for a subdomain that you own.
- In my case, I own okankonur.com. So if I get a wildcard SSL certificate for my domain and just add a DNS record that resolves some subdomain like bitwarden.okankonur.com to my home network IP, I am all set.
- This DNS record will be public, so I can access this from any device. No need to add it manually.
- Only thing is, I must renew my certificate every 3 months from Let’s Encrypt.
Assuming you are done with the certificate business and you have your certificate’s public and private key files on your pi.
Renewing the certificate:
$ certbot certonly --manual -d *.okankonur.com
Copy the resulting pem files to target folders, for example /ssl:
$ cp /etc/letsencrypt/live/okankonur.com/fullchain.pem /etc/ssl/certs/fullchain-okankonur.pem
$ cp /etc/letsencrypt/live/okankonur.com/privkey.pem /etc/ssl/certs/privkey-okankonur.pem
We are ready to start up our Vaultwarden instance with our SSL certificate info.
docker run -d --name vaultwarden --restart unless-stopped -v /bw-data:/data -v /etc/ssl/certs:/ssl -e ROCKET_TLS='{certs="/ssl/fullchain-okankonur.pem",key="/ssl/privkey-okankonur.pem"}' -p 443:443 -e ROCKET_PORT=443 vaultwarden/server:latest
You can now go to your instance through your subdomain URL and create an account to get started.
If you have other passwords exported in a format like .csv or json you can import them to Bitwarden.
Block Ads Even Before They Reach Your Home Network #
Meaning: blacklist the advertisement URLs with your custom internal DNS. How? Pi-hole.
- Default one-line install:
$ curl -sSL https://install.pi-hole.net | bash
- Then you need to go to your WiFi Router’s interface and add a custom DNS IP, which will correspond to your pi which runs the pi-hole. You can find detailed tutorial online.
Your Own Projects #
Dockerization and deployment of a minimum-dependency and lightweight apps have become very easy. For example you can dockerize your Java Maven Application with Jib easily.
You just need to configure your pom.xml and you can get your docker image as .tar file with a mvn package command on your lifecycle.
Then you copy that .tar file to your pi (you can use WinSCP as I mentioned).
Then a simple $ docker load -i yourimg.tar will load your container and you are ready to run it on your server.
*Note: If you are using watchtower to update images from docker hub, you would want to add the watchtower exclude label (see Keeping Your System Up To Date) to your docker run script.
What Now? #
So you have set up a very basic and efficient home server with your raspberry pi. Everyone you know has almost the same functionality with cloud services or browser extensions, was it worth the time you wasted?
Yes.